Sitefinity Configuration Guide
This guide describes how to configure Sitefinity for Single Sign On (SSO) scenarios with Rhythm.
The basic configuration will allow you to authenticate users using Auth0 for SSO. However, Auth0 has no knowledge of the user’s membership or other statuses within Rhythm.
By completing both the basic and role configuration, Sitefinity will automatically assign Sitefinity roles to users for each Rhythm Portal Security Policies for which they qualify.
Security Policies
You can create Security Policies for active members, committee members, or other ad-hoc eligibility requirements. See the Security Policies guide for more info.
Prerequisites
To enable SSO, you will need to know your Auth0 Domain and Client ID. You can get these values by submitting a support ticket to Rhythm. Please specify that you need this information to configure SSO in Sitefinity so the Rhythm team can enable the Sitefinity integration for your client.
warning
This configuration requires a version of Sitefinity that is covered under Long Term Support (LTS). Please see the SiteFinity's Lifecycle Policy page to confirm that your version is not Retired.
Basic Configuration
The configuration in this section will enable users to authenticate with Sitefinity using their Rhythm credentials stored in Auth0.
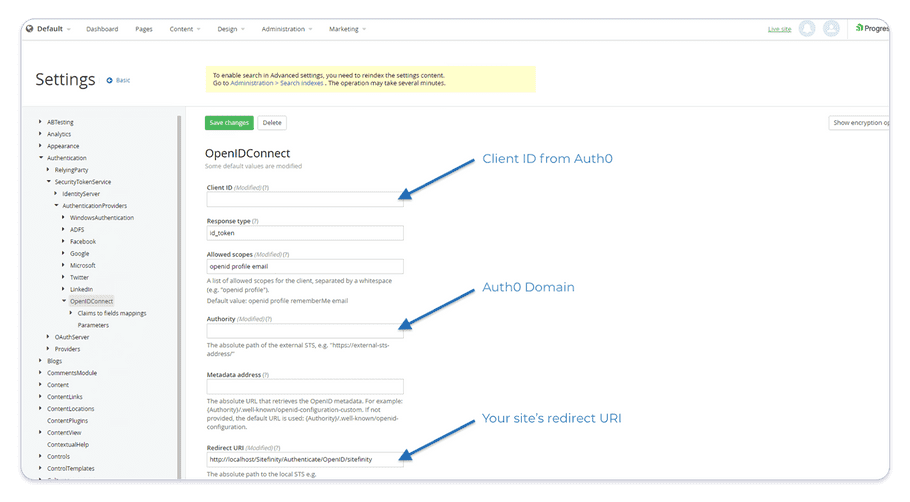
Start by navigating to the settings of your Sitefinity site and toggle to Advanced settings. Next, in the left menu navigate to Authentication > SecurityTokenService > AuthenticationProviders > OpenIDConnect and set the following values:
- Client ID: This should be the Auth0 Client ID supplied by Rhythm support
- Authority: This should be the Auth0 Domain supplied by Rhythm support
- Redirect URI: This should be the URL of your site in the format "http://[your-site-url]/Sitefinity/Authenticate/OpenID/sitefinity"
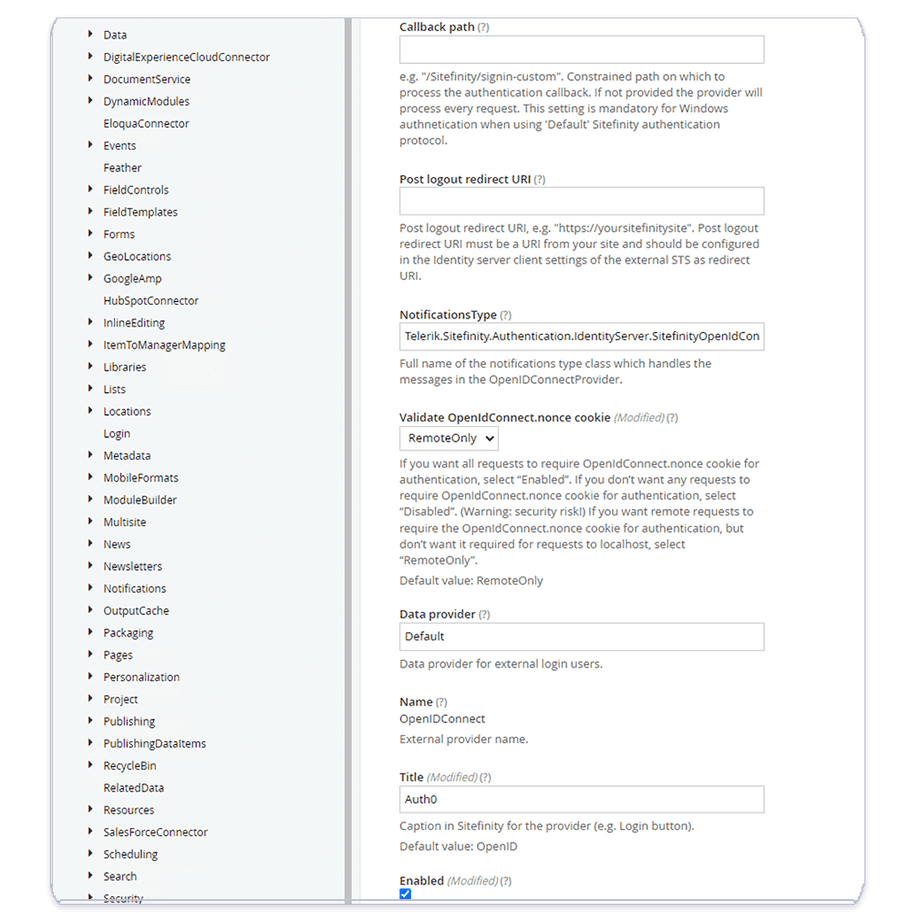
After this configuration, the OpenIDConnect settings should look like the following:

success
At this point, resetting your site using iisreset should enable SSO. We recommend testing this now, even if you continue to enable role assignment.
Role Assignment
This configuration is optionally used when you want to automatically assign roles to users based on Security Policies in Rhythm.
Security Policies
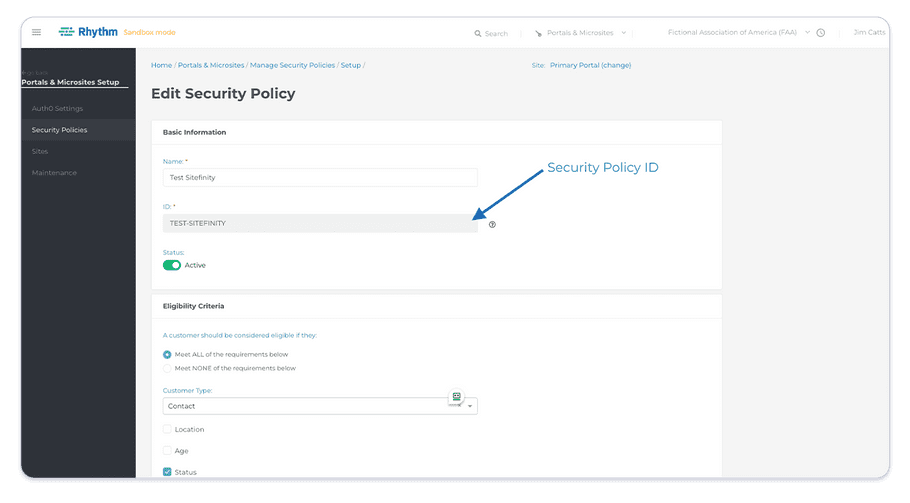
Start by configuring the Security Policies in Rhythm that you want to use to assign users to roles in Sitefinity. You have a wide range of options on how to segment your users and can create as many Security Policies as you would like. As you create each Security Policy it will be assigned an ID. Make note of these IDs as we will need them later. You can see an example ID in this screenshot:
Scope
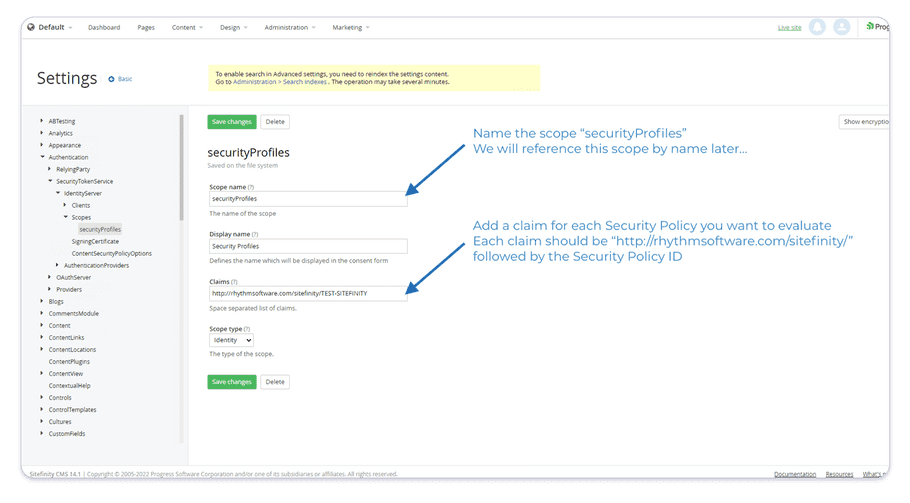
Return to the settings of your Sitefinity site and toggle to Advanced settings. Next, in the left menu navigate to Authentication > SecurityTokenService > IdentityServer > Scopes and create a new scope with the following values:
- Scope Name: "securityProfiles"
- Claims: This should be a comma separated list with each Security Policy you want to assign to a Sitefinity role. Using the Security Policy IDs you noted above, the claim for each Security Policy should be formatted like "http://rhythmsoftware.com/sitefinity/[Security Policy ID]"
Once complete, your new scope should look like:
You will now need to add this scope to the configuration in several locations.
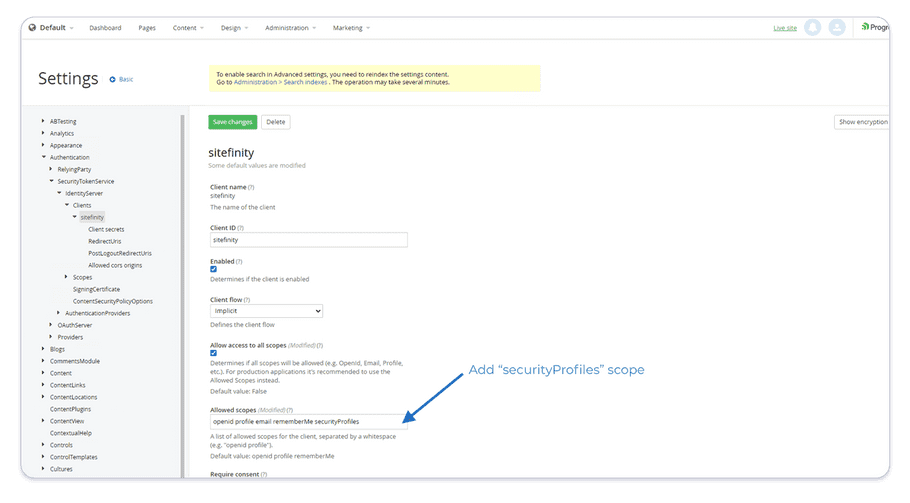
Sitefinity Client
Next, in the left menu navigate to Authentication > SecurityTokenService > IdentityService > Clients > sitefinity. Add the new "securityPofiles" scope you just created to the Allowed Scopes as in the screenshot below:
OpenIDConnect Configuration
Next, in the left menu navigate back to Authentication > SecurityTokenService > AuthenticationProviders > OpenIDConnect and add the new "securityProfiles" scope to the Allowed Scopes as on the screenshot below:

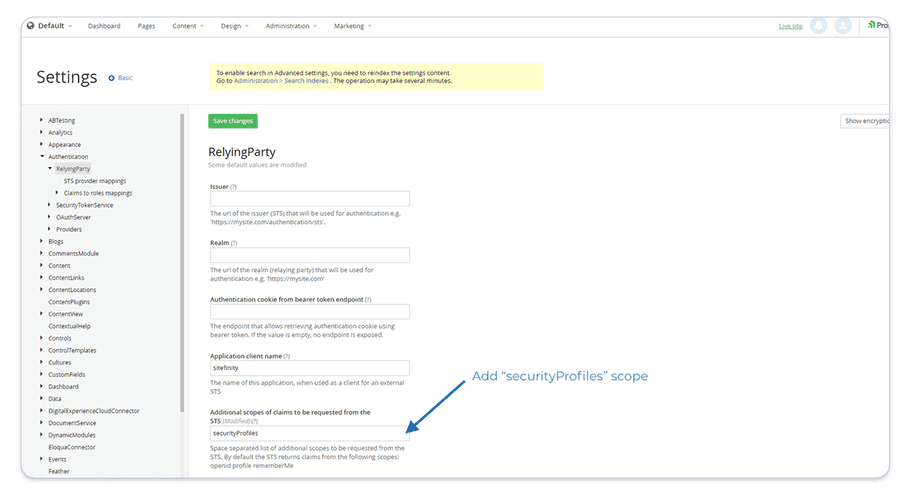
Relying Party
Next, navigate to Authentication > RelyingParty and add the new "securityProfiles" scope to the Additional scopes of claims to be requested from STS as in the screenshot below:
Claims to Role Mappings
Finally we are going to map the claim for each Security Profile to a Sitefinity role. Start by navigating to Authentication > RelyingParty > Claims to role mappings. For each Security Policy you want to map to a Sitefinity role, add a new mapping with the following values:
- Name: The name of the Security Policy
- Claim type: One of the Security Policy claim values you specified above in the format "http://rhythmsoftware.com/sitefinity/[Security Policy ID]"
- Claim value: "active"
- Mapped roles: One or more existing Sitefinity roles that users should be assigned if they are part of the Security Policy
Each mapping should look like the following screenshot:

success
Once all of your configuration is complete, you need to perform an iisreset to enable the new configuration. At this point, users should be assigned Sitefinity roles each time they log in.
warning
Please be aware, Sitefinity does not show roles assigned by claims in the User Administration area. If you look at a user who has logged in, all roles will always be unchecked. However, the roles will be assigned dynamically each time the user logs in. For more information see this help article